Leopedia Web Solutions - Car Rental System
Documentation Info
- Created: 01/01/2018
- Last Updated: 06/02/2019
- Created by: Leopedia Web Solutions
- Version: 1.0.0
- Compatible Browsers: IE8, IE9, IE10, IE11, Firefox, Safari, Opera, Chrome, Edge
- Files Included: JavaScript JS, CSS, PHP
- Software Version: PHP 7.x, MySQL 5.x, Laravel 5.5.45
- Website: http://www.leopedia.com
- Email: [email protected]
Introduction
It's a high quality, native and responsive Laravel plugin to rent a car, created by experienced Leopedia web solutions engineers. 100% of it's code is written by using native laravel functions, so it much faster and secure than other similar plugins. Also - we made it compatible with Multi-language setup with native support.
Plus – we love mobile-first designs – that's why we used Bootstrap, Font Awesome icons, CSS3 and HTML5 techniques with smooth image resizing to 4 different sizes to make sure that your cars would look great on all mobile devices, tablets, full-screen previews and pages.
Now both – your car rental business and website can run smoothly, by accepting online reservations and managing your entire fleet, from one control panel. By offering highly-customizable reservation system, your customers will be able to see vehicles availability, and make online reservations with a few clicks.
Features
- Real time availability.
- Assign unlimited car features / car type or class / car vendors.
- Insert unlimited car with image.
- Seasonal price setup by date-range for car
- Price can be set day wise (Mon, Tue, Wed etc)
- Set prepaid amount percent based on duration of rent.
- Set special discount percent based on duration of rent.
- Set unlimited car extras/options with per day price. example : GPS Navigation.
- Booking list by active booking, booking history, by customer.
- Printable Invoice from booking list.
- PayPal and Manual gateway integrated.
- After successful booking email notification both site owner and customer with invoice.
- Three type of price calculation available that is daily / hourly / Daily & Hourly Combined.
- you can define total number of car of a model.
- multiple car can be book at a time.
- can set pick-up date from current date.
- Multi-Location pick-up & drop-off
- Search booking list by date range.
- Admin Panel home page list for today booking, today pick-up, today drop-off.
- can add multiple extras/options of same item at the time booking.
- Multilingual feature for admin and front-end both.
- 16 Language Integrated
- Language add-on option
Multilingual Feature
Multilingual features for both admin and front-end. you can set anyone as default language. Also you can delete language which you not need.
Total 16 language integrated.
- Chinese
- Dutch
- English
- French
- German
- Greek
- Indonesian
- Italian
- Japanese
- Polish
- Portuguese
- Romanian
- Russian
- Spanish
- Thai
- Turkish
How different types of price setup work?
Three type of price calculation available that is daily / hourly / Daily & Hourly Combined.
You can change price calculation from admin panel: Price Manager > Price Calculation Setup
Pick-up Date & Time: 21/08/2012 9:00 AM
Drop-off Date & Time: 23/08/2012 3:00 PM
Daily & Hourly Combined: Price will be calculated of 2 Day(s) 6 Hour(s) and that apply 2 days daily price + 6 hours hourly price.
How to integrate booking engine with your existing website or new template?
Install script in any sub folder. for example “crental” folder.
so your front-end url: http://www.yourwebsite.com/crental/
Next, create a body blank page from your existing website design or new template.
Now copy & paste bellow html code in blank body of your design:
<iframe src="http://www.yourwebsite.com/car-rental/" frameborder="0" scrolling="auto" width="650" height="800" ></iframe>
Remember you must change src(front-end url of booking system). Height and Width must be changed as your fit.
IFRAME Tutorial Reference Guide: Click here
Installation
Server Requirements
In order to install car rental system application, your server must meet following requirements:
- PHP >= 7.0
- OpenSSL PHP Extension
- PDO PHP Extension
Installing car rental system Video Tutorial
Step 1 - Car rental Setup
Step 2 - Admin panel - Step by step introduction - 1
Step 3 - Admin panel - Step by step introduction - 2
Step 4 - Admin panel - Step by step introduction - 3
Step 5 - Admin panel - Step by step introduction - 4
Step 6 - Front end - Step by step introduction - 1
Step 7 - Enter your Gmail credentials in .env file
Step 8 - Front end - Car reservation step by step
Step 9 - Admin panel - After booking successful show booking in dashboard and booking manager
Step 10 - Admin panel - After booking successful show booking customer wise, cancel booking, delete booking and edit customer profile detail
Installing car rental system
After downloading the ZIP archive, and uploading it to your server, first thing you have to do is to create the database where system tables will be created. Let's say, you create the database called carrental.
Find .env file in local folder then APP_URL - APP_URL is Laravel required configuration and is the URL where your system will be installed.
- Eq. If you are installing on subdomain you will set http://www.sub.domain.com/
- Eq. If you are installing on subfolder you will set http://www.domain.com/crm/
- Eq. If you are installing on the main domain you need to set just http://www.domain.com/
When installing the system will auto try to guess your APP_URL however you can adjust to your needs
Keep in mind that the APP_URL must end with trailing slash (/)
For SSL use: https://www.yourdomain.com/carrentalsystem/
Step 1 - Database Info
Upload the files to your hosting folder and navigate to the location where you will install car rental system http://www.domain.com/install/index.php or subdomain http://sub.domain.com/install/index.php
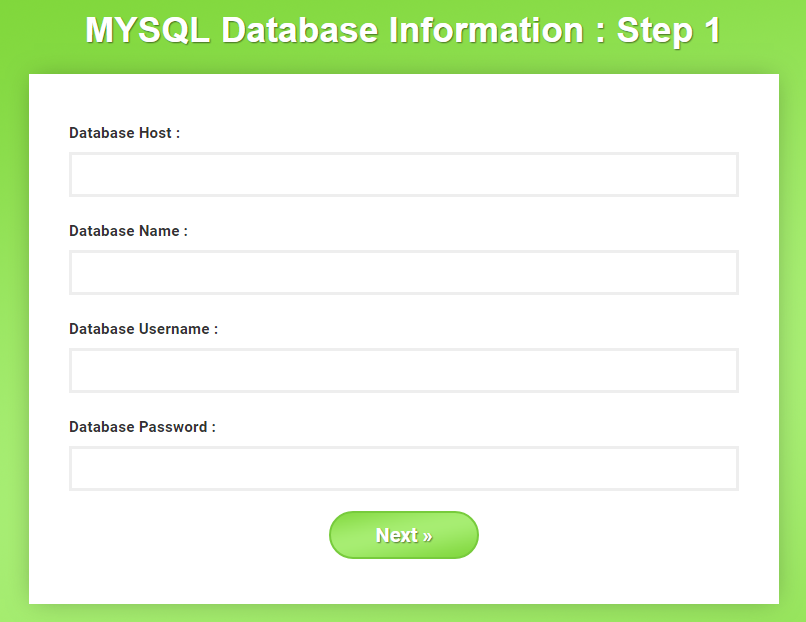
Note: Make sure you have checked All privileges when adding the user to database.
Ok, since this is the first time that you are accessing the system, the installation wizard, will be displayed.
You have to fill in your database credentials.
Please do not hesitate to contact us if you need help installing car rental system.
Step 2 - Admin Details
On step 2 you have to fill in your user credentials.
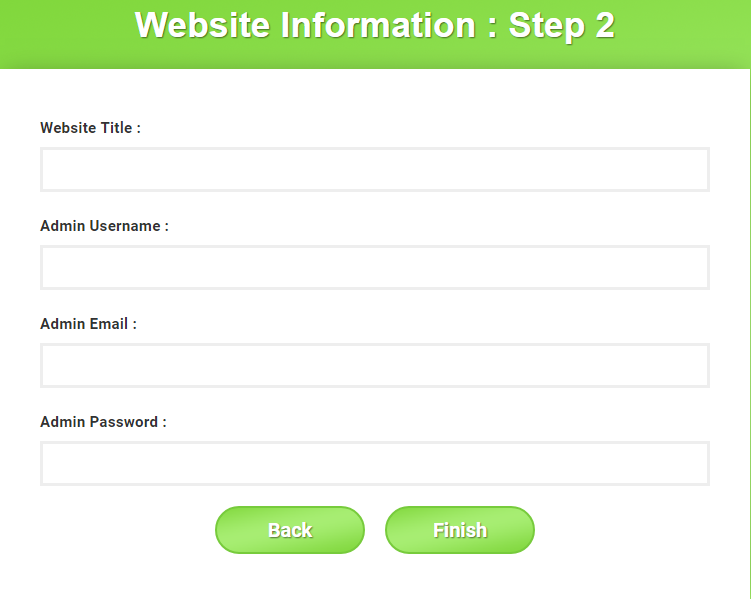
Note: Make sure you have checked All privileges when adding the user to database.
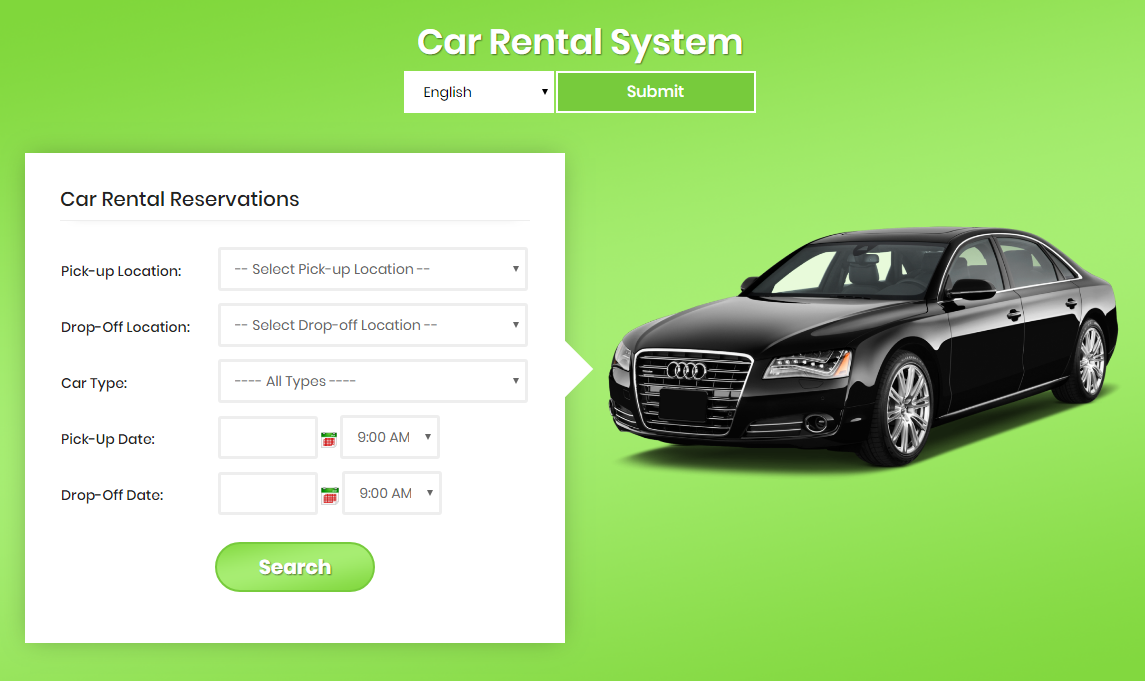
Step 3 - Complete Installation
Once application is successfully completed, you will see the Home page, as per below
Usage
Step 1 - Admin Login
- Eq. If you are set to a subdomain, your administrator will have the login url http://www.sub.domain.com/login
- Eq. If you are set to the subfolder, your administrator will have the login url http://www.domain.com/crm/login
- Eq. If you are located on the main domain, your admin login URL will be http://www.domain.com/login
You have to fill in your user credentials.
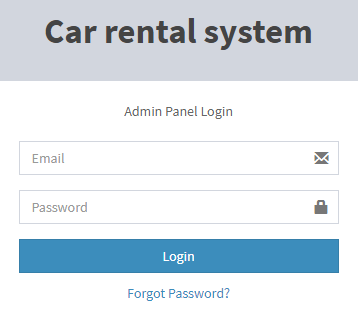
Note: If you have forgotten your admin password then follow the steps given below, Otherwise, go to step 2 after successful login
Forgot password
Click the Forgot Password link in admin login page
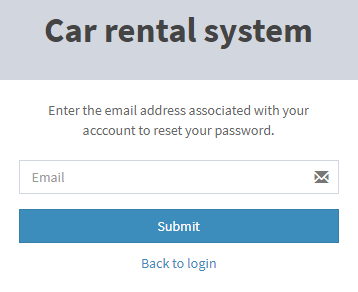
Enter the email ID and click the submit button After checking your email inbox, click the Reset Password button to create a new password.
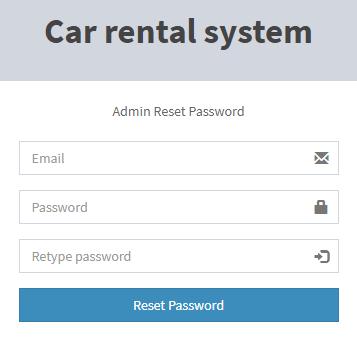
Enter the email ID and create a new password and type the password again then click on the reset password.
Step 2 - Car Vendors
On step 2 Add car vendors - you have to click on CAR MANAGER > Car vendors > Add New Vendor
Edit car vendors - you have to click on CAR MANAGER > Car vendors > Edit
Delete car vendors - you have to click on CAR MANAGER > Car vendors > Delete
Show all car vendors - you have to click on CAR MANAGER > Car vendors
Step 3 - Car Types
On step 3 Add car Types - you have to click on CAR MANAGER > Car Types > Add New Type
Edit car Types - you have to click on CAR MANAGER > Car Types > Edit
Delete car Types - you have to click on CAR MANAGER > Car Types > Delete
Show all car Types - you have to click on CAR MANAGER > Car Types
Step 4 - Car Features
On step 4 Add car Features - you have to click on CAR MANAGER > Car Features > Add New Feature
Edit car Features - you have to click on CAR MANAGER > Car Features > Edit
Delete car Features - you have to click on CAR MANAGER > Car Features > Delete
Show all car Features - you have to click on CAR MANAGER > Car Features
Step 5 - Location Manager
On step 5 Add Location - you have to click on CAR MANAGER > Location Manager > Add New Location
Edit Location - you have to click on CAR MANAGER > Location Manager > Edit
Delete Location - you have to click on CAR MANAGER > Location Manager > Delete
Show all Location - you have to click on CAR MANAGER > Location Manager
Step 6 - Car List
On step 6 Add Car - you have to click on CAR MANAGER > Car List > Add New Car
Edit Car - you have to click on CAR MANAGER > Car List > Edit
Delete Car - you have to click on CAR MANAGER > Car List > Delete
Show all Car - you have to click on CAR MANAGER > Car List
Step 7 - Price Calculation Setup
On step 7 you have to click on PRICE MANAGER > Price Calculation Setup > Select "Daily & Hourly Combined" > Submit
Step 8 - Car Price Plan
On step 8 Edit Regular Price plan - you have to click on PRICE MANAGER > Car Price Plan > Select Car in dropdown list > Edit
Date Range/Seasonal Price plan - you have to click on PRICE MANAGER > Car Price Plan > Add New Price Plan > Select Car in dropdown list
Edit Date Range/Seasonal Price plan - you have to click on PRICE MANAGER > Car Price Plan > Select Car in dropdown list > Edit
Delete Price plan - you have to click on PRICE MANAGER > Car Price Plan > Select Car in dropdown list > Delete
Step 9 - Prepaid Amount Setting
On step 9 Add New Deposit Scheme - you have to click on PRICE MANAGER > Prepaid Amount Setting > Add New Deposit Scheme
Eg. 1) Day From : 1, Day To : 5, Deposit : 10
Eg. 2) Day From : 6, Day To : 10, Deposit : 20
Show all Deposit/Prepaid upon Duration List - you have to click on PRICE MANAGER > Prepaid Amount Setting
Edit Deposit Scheme - you have to click on PRICE MANAGER > Prepaid Amount Setting > Edit
Delete Deposit Scheme - you have to click on PRICE MANAGER > Prepaid Amount Setting > Delete
Step 10 - Discount upon duration
On step 10 Add New Discount Scheme - you have to click on PRICE MANAGER > Discount upon duration > Add New Discount Scheme
Eg. 1) Day From : 1, Day To : 7, Discount : 5
Eg. 2) Day From : 8, Day To : 15, Discount : 10
Show all Discount upon duration List - you have to click on PRICE MANAGER > Discount upon duration
Edit Discount Scheme - you have to click on PRICE MANAGER > Discount upon duration > Edit
Delete Discount Scheme - you have to click on PRICE MANAGER > Discount upon duration > Delete
Step 11 - Car Extras
On step 6 Add Car Extras - you have to click on PRICE MANAGER > Car Extras > Add New Extras
Edit Car Extras - you have to click on PRICE MANAGER > Car Extras > Edit
Delete Car Extras - you have to click on PRICE MANAGER > Car Extras > Delete
Show all Car Extras - you have to click on PRICE MANAGER > Car Extras
Step 12 - Global Setting
On step 12 Add/Edit Setting - you have to click on SETTING > Global Setting
Step 13 - Payment Gateway
On step 13 Add/Edit Payment Gateway - you have to click on SETTING > Payment Gateway
Step 14 - Booking List
On step 14 Show Booking List - you have to click on BOOKING MANAGER > Booking List > Select Booking Type > Search
You can also search booking list by Booking Date, Pick-Up Date, Drop-Off Date
You can also search booking list by Date Range
You can View Booking details, print voucher and temporary delete booking
Note: If you don't see any data in table then book car from Front end side.
Step 15 - Customer Lookup
On step 15 You can show booking list by customer and edit customer detail.
Show Booking List - you have to click on BOOKING MANAGER > Customer Lookup > View Bookings
Edit customer detail - you have to click on BOOKING MANAGER > Customer Lookup > Edit
You can View Booking details of particular customer, print voucher, cancel booking and delete forever booking
Note: If you don't see any data in table then book car from Front end side.
Step 16 - Dashboard
On step 16 You can view Today Booking List, Today Pick-up List and Today Drop-off List.
Step 17 - Paypal
On step 17 If you want to add paypal credentials then go to app >> config >> open paypal.php file and insert your paypal credentials..
Support
If you need any help regarding this plugin installation & usage, please write to our support with topic "Car rental Support".
Our contact details: